Share
Table of Contents
- 1. Find a Great Name
- 1.1 Make sure the name is simple
- 1.2 Give meaning
- 1.3 Need to discard Numbers & Hyphens
- 1.4 Avoid cliches and frequently used words
- 2. Host your site/blog
- 2.1 Select a hosting plan
- 2.2 Check for Site Name Availability
- 2.3 Use Pay Pal or Credit Card
- 2.4 Create Your Password For Your Account
- 3. Install WordPress
- 4. Select a nice theme
- 5. Install Essential Plugins

This guide is for those who want to run a truly GREAT travel site.
Thinking of starting a travel site? This article will show you how.
1. Find a Great Name
Finding a name is more challenging as most popular domain names are already reserved. From seeing the name I can figure out whether people gave some thought. It took many days of brainstorming before I could settle for a name. Here are some tips to get a good name.
1.1 Make sure the name is simple
The site name is considered good if it is easy to type and remember. Try to play to list of words.
1.2 Give meaning
The site name is good if it resonates with what you are doing. Give it a try. Search for meaningful domain names.
1.3 Need to discard Numbers & Hyphens
The site name will become more complex if you put hyphens and numbers. Better avoid it.
1.4 Avoid cliches and frequently used words
It’s not good to use commonly used words as it may confuse the reader.
2. Host your site/blog
Most websites need to rent space to store the data. There are many hosting providers in the world right now. While many hosting providers are quite expensive, Bluehost offers great hosting at an affordable price. First, you can purchase a shared hosting account and later you can shift to a dedicated server.
Advantages of Using Bluehost Hosting
Bluehost provides excellent customer support. Also, when you subscribe you get a free domain along with it.
2.1 Select a hosting plan
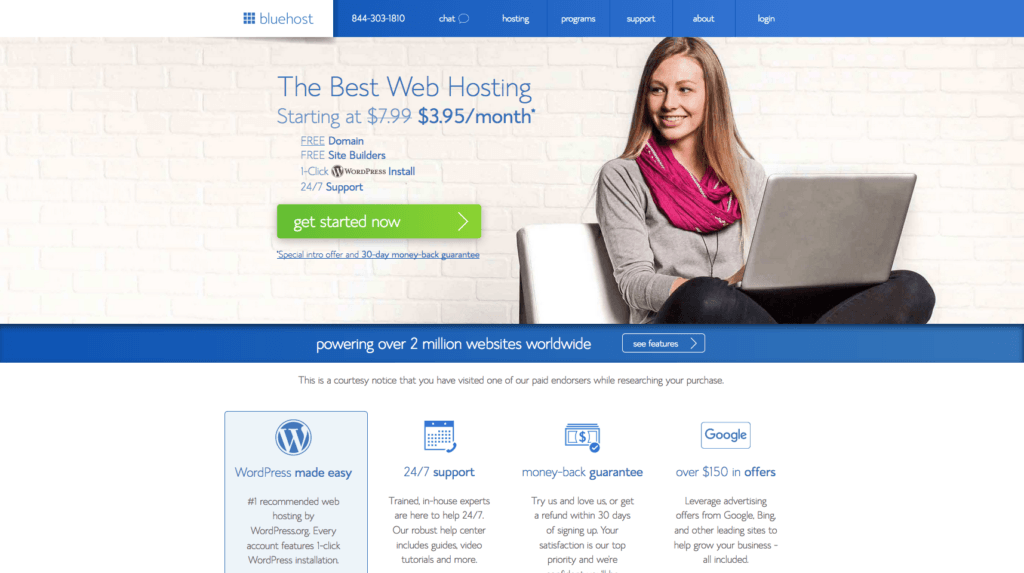
Choose the basic plan if you want to host only a single website. If you want to host more than one website choose the Plus or Choice Plus Plan. I would recommend the Choice Plus Plan as it comes with extra features like Domain Privacy and Code Guard Basic.
Sign Up for Bluehost (Hosting+ Domain Name)
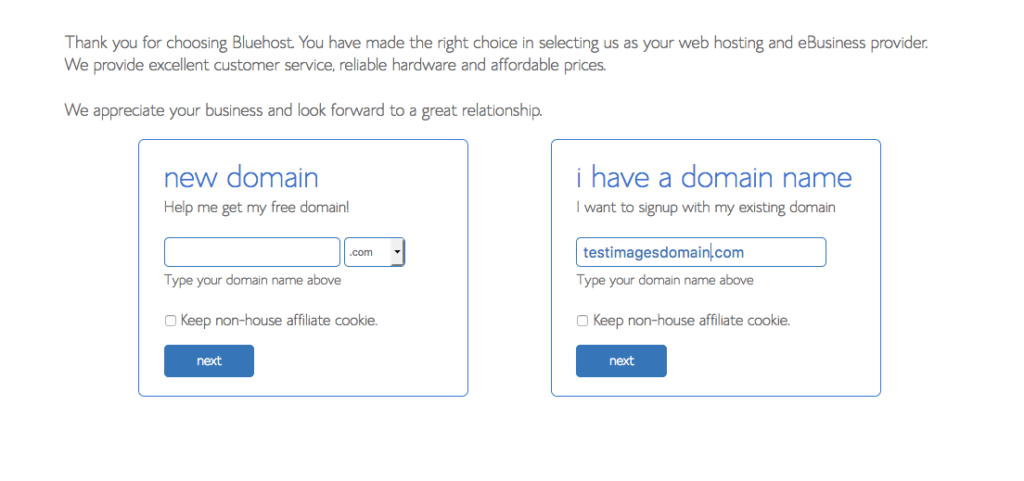
2.2 Check for Site Name Availability
Check for the availability of your free site. If its available immediate block it.
2.3 Use Pay Pal or Credit Card
Remember that you need to have a credit card or a pay pal account to process it.

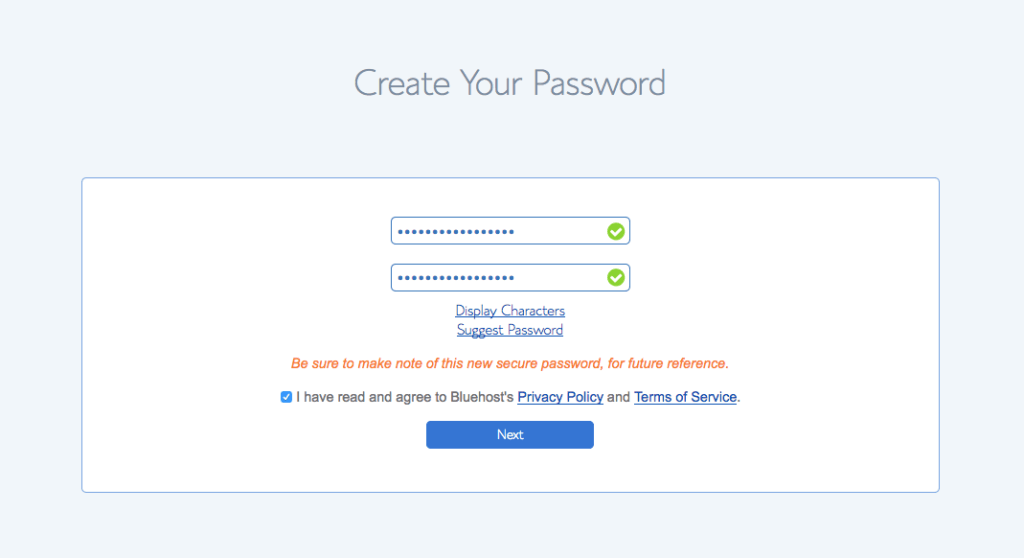
2.4 Create Your Password For Your Account
After paying, choose a password for your account.
3. Install WordPress
WordPress software can be installed quite easily once you are in the control panel. WordPress is easy to learn and there are many tutorials available on the net which you can make use of.
4. Select a nice theme
Select a nice theme if you can. If you can’t that’s fine.